Shot Notes
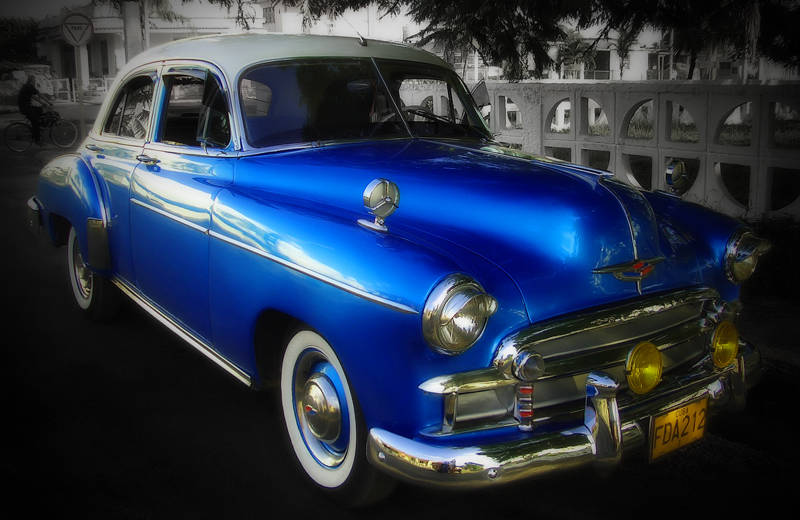
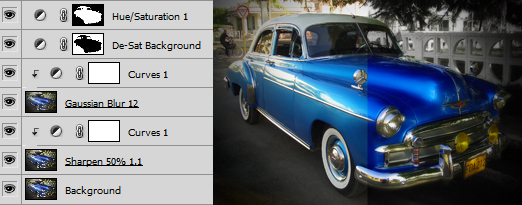
I shot this beautiful car in Cienfuegos in Cuba. This is my first attempt at using the Orton Effect. At this point I must mention the very cool photoblog zOOm and thank Florence for sharing this technique. In essence the effect is created by duplicating a layer, blurring it and setting the blend mode to multiply. This significantly darkens the image so I applied curves to brighten each layer. I applied a little vignette and some masked desaturation to keep the focus on the subject.


I must admit that I’m very admirative, for a first try, this is spectacular ! Well done Jason and it’s cool too that you can share this technics as well. On Aminus we cannot not attached docs. Thank you for the link Jason and for the nice words. You’re a gent !
Let’s have a ride in this little blue wonder !
very nice ride nicely frame…….
Excellent picture! it’s perfect!
what a lovely shot. the light and colours are perfect. love this.
Crisp and clean. Very nice colours and lighting…
Excellent processing once again. I have so much to learn – you inspire me.
great car… heard a lot about cuba and the old cars you can find there, would like to go there one day as well.
and a nice work, of course
Fantastic shot. You really nailed the processing with the Orton effect. Also, its so cool how you post the Layers too!
[...] is a 1950 Buick we saw on the streets of Cuba. To process the image I used a similar technique to Cuba Chevrolet. I started by using the Orton Effect to give it a bit of a glow. I worked on the dusty red colour. [...]
[...] Brush Tool set to Content-Aware. I then added Vignette, Viberence, Selective De-saturation and the Orton Effect. Then I gently lifted the pastel shades of the buildings using individual channel curves. I tried [...]
[...] Chevrolet in Trinidad, Cuba. To process this image I used a similar technique as the Blue Chevy. Orton Effect on the car and de-sat and de-focus background. To add some extra sparkle I also added a subtle [...]